6 minutes
Persisting Angular Portals
Yet another post about portals
It’s 2019. If you are an Angular developer, you’ve probably heard about Portals. If not, let me sum it up for you real quick.
Angular Portals are part of the Angular CDK(Component Dev Kit), which, I quote, “is a set of tools that implement common interaction patterns whilst being unopinionated about their presentation.”
More specifically, Portals are very useful to solve a common problem: how to dynamically render content into an application.
In order to do this, we need two components: a Portal and a PortalOutlet.
I like to think of the PortalOutlet as a frame, and the Portal as a canvas. We can place a canvas in different frames, and we can put different canvases in a frame.
I will not dive deeper into this explanation. If you need to brush up the basics, I recommend these posts:
The setup
So what’s this post about?
I am going to describe a simplified setup of a situation that I encountered at my current job.
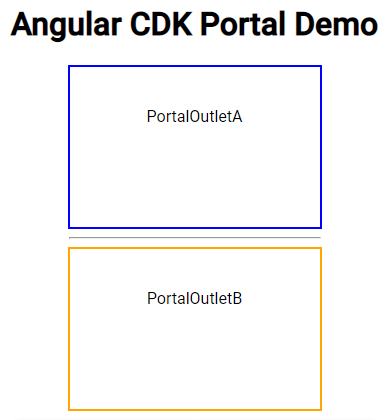
Let’s say we have two PortalOutlets(A and B) on the main Component of our application, like this:
Now, we want to put a ComponentPortal inside these PortalOutlets.
We will create a very simple Component called PortalComponent, which will be used to create the Portal.
this.portal = new ComponentPortal(PortalComponent);
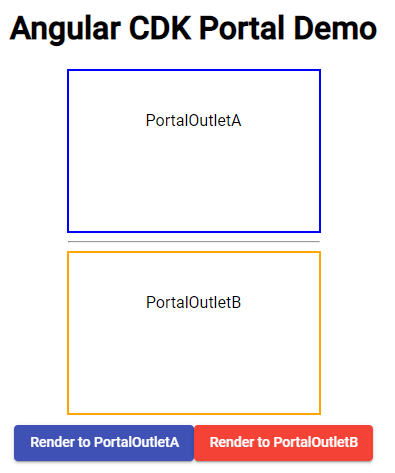
Sometimes, we want to display this Portal in PortalOutletA, and sometimes in PortalOutletB. In order to do this, we add two buttons, who will render the Portal to the corresponding PortalOutlet. This is the result:
The template of our component will look more or less like this.
<div class="outlet">
  <div class="a">
    PortalOutletA
    <ng-template [cdkPortalOutlet]="selectedPortalA"></ng-template>
  </div>
  <hr />
  <div class="b">
    PortalOutletB
    <ng-template [cdkPortalOutlet]="selectedPortalB"></ng-template>
  </div>
</div>

<div class="buttons">
  <button (click)="handleAClick()">
    Render to PortalOutletA
  </button>

  <button (click)="handleBClick()">
    Render to PortalOutletB
  </button>
</div>
Our Component itself is also pretty self-explanatory.
We create the Portal in the ngAfterViewInit event, and each button sends the Portal to its corresponding PortalOutlet.
export class AppComponent implements AfterViewInit {
  public selectedPortalA: ComponentPortal<PortalComponent>;
  public selectedPortalB: ComponentPortal<PortalComponent>;
  private portal: ComponentPortal<PortalComponent>;

  constructor() {}

  ngAfterViewInit() {
    this.portal = new ComponentPortal(PortalComponent);
  }

  public handleAClick(): void {
    this.selectedPortalB = undefined;
    this.selectedPortalA = this.portal;
  }

  public handleBClick(): void {
    this.selectedPortalA = undefined;
    this.selectedPortalB = this.portal;
  }
}
Let’s test it.
It works! We are able to display the same Portal into two different PortalOutlets, with just a click.
The problem
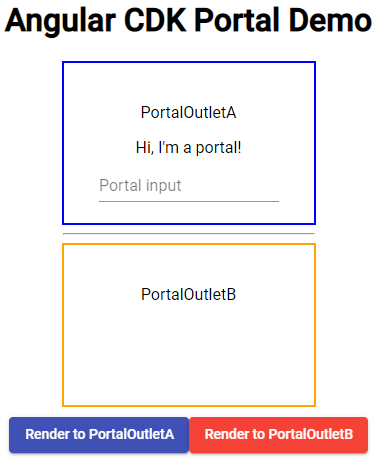
As you may have noticed, the ComponentPortal has a text input.
We can try to write something in the input, and it will work perfectly, but as soon as we click the button to move the Portal from one PortalOutlet to the other, the content of the input will be erased.
Why is this? One would imagine that the ComponentPortal travels through time and space and arrives in the same condition as it left. But that is not the case.
Each time that a Portal is attached to a PortalOutlet, the Component is initialised, so this means that all previous state will be destroyed, deleted, erased, finito.
How can we overcome this? If you are a somewhat experienced developer, you may be thinking that this problem has an obvious solution, and maybe you are right. But I must confess that finding this solution took me some time.
An old friend: State management
What needs to be done is simple:
- Before the Portal is destroyed, we must store its value -> we will use the angular lifecycle event
ngOnDestroy - When the new Portal is created, we need to restore its previous state -> we will use the angular lifecycle event
ngOnInit
In order to do this, we need to implement some kind of state management in our app.
There are lots of state management librearies out there, and we are going to take a look at how to implement the solution to our problem using Akita, the new cool kid in the state management block 😁
Akita
Again, I’m not gonna explain in detail what Akita is. We could say that, just as ngrx, Akita is state management library for Angular applications, but unlike ngrx, Akita has very little boilerplate code, which improves code readibility and makes it easier to mantain in large codebases.
I’m gonna quote here the firsts line of Akita’s documentation, which really sold the concept to me :
Akita is a state management pattern, built on top of RxJS, which takes the idea of multiple data stores from Flux and the immutable updates from Redux, along with the concept of streaming data, to create the Observable Data Store model.
This is my personal choice, but you could implement the same solution using any other state management library out there.
The solution
In order to implement the necessary state management, what we need to do is the following:
- Create a PortalModel: this will be a model of the data that we want to store. Initially, we will only store the input text, but as the application grows, we can modify this model to add other information.
export type Portal = {
  input: string;
};
- Create a PortalStore: the store is the single source of truth of the application. It’s where all our Portal data will be stored.
export interface PortalState extends EntityState<Portal> {}

@Injectable({ providedIn: "root" })
@StoreConfig({ name: "portal" })
export class PortalStore extends EntityStore<PortalState, Portal> {
  constructor() {
    super();
  }
}
- Create a PortalService: the service will be in charge of saving the Portal state to the store. The
upsertmethod updates or inserts an entity in the store.
@Injectable({ providedIn: "root" })
export class PortalService {
  constructor(private booksStore: PortalStore) {}

  savePortal(id: number, portal: Portal): void {
    this.booksStore.upsert(id, portal);
  }
}
- Create a PortalQuery: we will use it to get the Portal state in order to restore it.
@Injectable({ providedIn: "root" })
export class PortalQuery extends QueryEntity<PortalState, Portal> {
  constructor(protected store: PortalStore) {
    super(store);
  }
}
As you can see, we did not write a single change to the default Store and Query. Akita offers all the functionality that we need out of the box, so we can avoid creating loads of boilerplate.
Now, with all these little pieces of state management in place, we can finally use the Angular lifecycle to store and restore the Portal state:
ngOnInit() {
  // Restore Portal state
  this.subscription = this.portalQuery
    .selectEntity(1)
    .subscribe((value: Portal) => {
      if (value) {
        this.inputText = value.input;
      }
    });
}

ngOnDestroy() {
  this.subscription.unsubscribe();
  // Save Portal state
  this.portalService.savePortal(1, { input: this.text });
}
In a real Angular application, you would create real IDs for the entities, but for the sake of simplicity, I have harcoded the ID of the entity as 1.
And with this, we have finished. Now the state of the Portal’s input text is saved and restored when the Portal changes its PortalOutlet, so we have avoided the data loss!

As the complexity of the component grows, we would need to modify its model and save all the needed information in the ngOnDestroy, but that’s it, this solution scales pretty well.
If you are interested, you can check out the code in this gitlab repo
Conclusion
This is the end of the post, I hope that you enjoyed it! As a quick summary, there are two important things that I learnt with this problem:
- Angular Portals are inevitably destroyed when they move from one PortalOutlet to another, and so its state is 💥lost💥.
- We can use state management libraries to preserve said state before it’s lost.
So if you are planning on using Portals in your application, keep this in mind!
See you around😀